Introduction
Walk into your kitchen at 6 AM, and the harsh overhead light makes everything feel clinical and unwelcoming. Later that evening, shadows fall across your cutting board, making dinner prep frustrating and potentially dangerous. Poor kitchen lighting doesn’t just affect aesthetics—it impacts functionality, safety, and how much you actually enjoy spending time in your kitchen.
Most homeowners make the mistake of relying on a single central fixture, creating uneven illumination with bright spots and dark corners. Professional designers know that exceptional kitchen lighting requires multiple layers working together, each serving a specific purpose. The difference between adequate and outstanding kitchen lighting lies in understanding how these layers interact.
In this guide, you’ll learn the exact formula for layering kitchen lighting like a professional designer, including specific measurements for fixture placement, lumen calculations for your space, and practical strategies you can implement whether you’re renovating or working with existing electrical.
The Three Essential Layers
Kitchen lighting design requires three fundamental layers:
- Ambient Lighting – Overall illumination providing general visibility (35-50 lumens per square foot)
- Task Lighting – Focused light for work areas like countertops, sinks, and stoves (70-80 lumens per square foot)
- Accent Lighting – Decorative elements highlighting architectural features or creating atmosphere
Combine these layers with dimmers on separate circuits to create a flexible lighting system that adapts from bright workspace to intimate dining environment.
Kitchen Lighting Quick Reference Guide
| Lighting Layer | Lumens Needed | Fixture Types | Ideal Color Temp | Typical Cost Range |
| Ambient | 35-50 per sq ft | Recessed, flush mount, chandeliers | 3000-4000K | $200-$800 |
| Task | 70-80 per sq ft | Under-cabinet, pendants, track | 4000-5000K | $300-$1,200 |
| Accent | 10-15 per sq ft | LED strips, puck lights, picture lights | 2700-3000K | $150-$500 |
| Decorative | Varies | Statement fixtures, pendants | 2700-3000K | $100-$2,000+ |
Understanding Kitchen Lighting Layers
Kitchen lighting design transforms ordinary spaces into functional, beautiful environments through strategic layering. Think of lighting layers like clothing—you need base layers for coverage, functional pieces for specific tasks, and finishing touches for style. Each layer serves a distinct purpose while working harmoniously with the others.
The layered approach solves common kitchen lighting problems that single-source lighting cannot address. You eliminate harsh shadows that make food prep difficult, reduce eye strain from inadequate illumination, and create flexibility for different activities throughout the day. A properly layered kitchen functions beautifully whether you’re chopping vegetables, entertaining guests, or enjoying a quiet morning coffee.
Most importantly, layering gives you control. With separate circuits and dimmers for each layer, you adjust lighting intensity and mood instantly. Morning meal prep requires bright, energizing light, while evening dining benefits from softer, warmer tones. This flexibility makes your kitchen genuinely multipurpose rather than locked into a single lighting scenario.
The beauty of this approach lies in its scalability. Even modest budgets can implement basic layering principles, while extensive renovations incorporate advanced systems with smart controls and customized solutions. Now that you understand why layering matters, let’s explore each layer in detail.
Layer One: Ambient Lighting—Your Foundation
Ambient lighting provides the baseline illumination that makes your entire kitchen functional and safe to navigate. This layer eliminates dark corners, reduces contrast between light and shadow, and creates the overall brightness level for your space. Without adequate ambient lighting, even the best task lights cannot compensate.
For optimal ambient lighting, calculate your kitchen’s square footage and multiply by 35-50 lumens. A 150 square foot kitchen needs 5,250-7,500 total lumens from ambient sources. You’ll achieve this through ceiling-mounted fixtures positioned strategically throughout the space rather than concentrated in a single location.
Ambient Fixture Options and Placement
Recessed lighting remains the most popular ambient solution, offering clean lines that work with any design style. Space recessed lights 4-6 feet apart in a grid pattern, positioning them approximately 3 feet from walls to minimize shadows. For an 8-foot ceiling, use 4-inch housings; 10-foot ceilings accommodate 5-6 inch fixtures for better light spread.
Semi-flush or flush-mount ceiling fixtures provide ambient lighting with more visual interest than recessed lights. Center these fixtures over main kitchen zones—one over the sink area, another over the primary work triangle. Choose fixtures with diffused glass or fabric shades that distribute light evenly rather than directing it downward in a concentrated beam.
Track lighting systems offer flexibility for ambient illumination, especially in kitchens with irregular layouts or where recessed installation proves challenging. Position tracks to follow your kitchen’s perimeter or work zones, spacing individual heads 3-4 feet apart. Aim heads at different angles to eliminate shadows and create even coverage across all surfaces.
Consider ceiling height when selecting ambient fixtures. Standard 8-foot ceilings benefit from flush-mount options that don’t encroach on headroom. Ten-foot or higher ceilings accommodate semi-flush or even small chandeliers that add personality while providing necessary illumination. Your ambient layer should feel neither harsh nor dim—it creates the comfortable baseline that other layers build upon.
Layer Two: Task Lighting—Precision Where You Need It
Task lighting delivers focused illumination directly to work surfaces where you perform specific activities. This layer eliminates shadows cast by your body when standing at counters, provides adequate light for detailed work like reading recipes or chopping ingredients, and reduces eye strain during extended kitchen sessions.
The key to effective task lighting lies in positioning fixtures between your head and the work surface. This prevents your body from blocking light and casting shadows on the very area you’re illuminating. Under-cabinet lights exemplify this principle perfectly, mounted beneath upper cabinets to shine directly onto countertops without interference.
Essential Task Lighting Zones:
- Countertop prep areas: Under-cabinet LED strips or puck lights every 12-18 inches
- Kitchen island: Pendant lights 30-36 inches above surface, spaced every 24-30 inches
- Sink area: Recessed lights or pendants centered directly above
- Stove/cooktop: Range hood with integrated lighting or dedicated recessed fixture
- Reading/desk areas: Adjustable task lamps with 40-60 watt equivalent brightness
Under-cabinet lighting represents your most important task lighting investment. LED strip lights provide continuous, even illumination along the entire counter length, eliminating the gaps that puck lights create. Mount strips toward the front of cabinets to minimize glare on backsplashes while maximizing counter coverage. Dimming capability allows you to adjust brightness from intense prep work to gentle ambient glow.
Kitchen island task lighting typically employs pendant fixtures for both illumination and visual interest. Hang pendants 30-36 inches above the counter surface to provide adequate light without obstructing sight lines. For an island that seats diners, choose fixtures with opaque or translucent shades that prevent glare at eye level. Transparent glass pendants work better over prep-only surfaces where people don’t sit facing the lights.
Your cooktop requires dedicated task lighting beyond the ambient layer. Quality range hoods incorporate powerful LED lights that illuminate burners and pots effectively. If your hood lacks adequate lighting, install a recessed fixture directly above the cooktop, positioned slightly toward the front to light the cooking surface rather than just the back wall.
Sink task lighting prevents the shadows created when you stand at the sink blocking ambient light. A recessed fixture or small pendant centered above the sink provides direct illumination for dishwashing, food rinsing, and other sink tasks. Position this light slightly forward of the faucet to avoid shadows from the fixture itself.
Layer Three: Accent Lighting—Creating Depth and Drama
Accent lighting adds the visual interest that transforms functional kitchens into designed spaces with personality and depth. This layer highlights architectural features, creates focal points, and introduces warmth that purely functional lighting cannot achieve. While ambient and task layers prioritize practicality, accent lighting prioritizes aesthetics.
The strategic use of accent lighting draws the eye to your kitchen’s best features while minimizing less attractive elements. Glass-front cabinets glow with internal LED strips, showcasing dish collections or glassware. Open shelving benefits from miniature spotlights that create shadow and dimension rather than flat illumination. Even the texture of stone backsplashes becomes more dramatic with proper accent lighting.
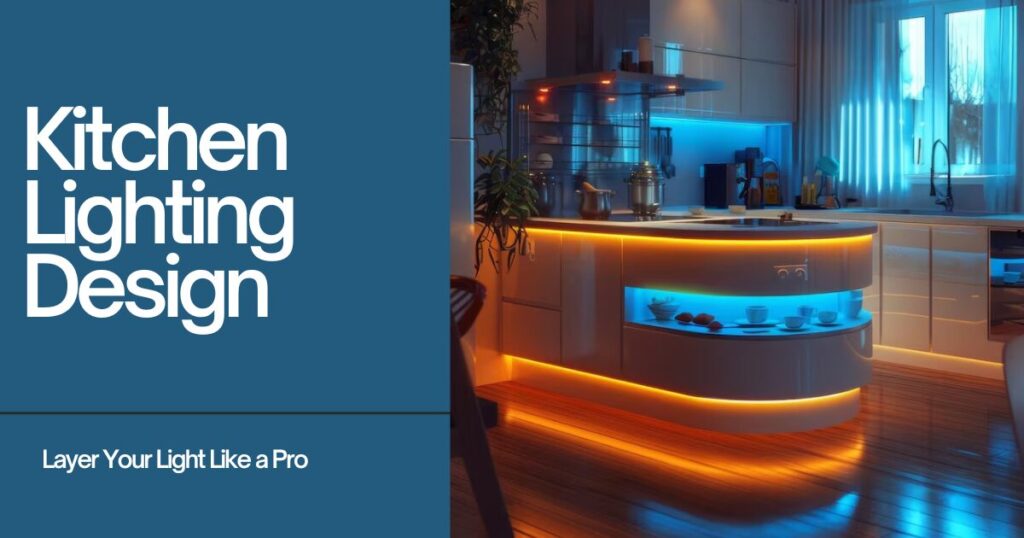
Toe-kick lighting represents an often-overlooked accent opportunity. LED strips installed at the base of cabinets create a floating effect while providing subtle floor-level illumination that aids nighttime navigation. This low-level lighting makes kitchens feel larger and more sophisticated without adding overhead fixtures.
Above-cabinet lighting solves the problem of wasted space atop cabinets while adding ambient glow that softens the ceiling-cabinet junction. Position LED strips along the top back edge of cabinets to wash light upward across the ceiling. This indirect lighting technique makes ceilings appear higher and kitchens feel more spacious, particularly beneficial in rooms with standard 8-foot ceilings.
Display lighting within glass-front cabinets or open shelving requires careful planning. Use puck lights or small LED strips positioned toward the front of shelves to minimize shadows while maximizing visibility of displayed items. Battery-operated LED pucks work well for cabinets without convenient electrical access, though hardwired options provide more reliable long-term performance.
Consider color temperature carefully for accent lighting. Warmer tones (2700-3000K) create inviting, comfortable atmospheres appropriate for evening use and entertaining. Cooler temperatures work better for task lighting but feel harsh and unwelcoming in accent applications. Your accent layer should complement rather than compete with ambient and task lighting temperatures.
Choosing the Right Color Temperature
Color temperature dramatically affects how your kitchen feels and functions throughout the day. Measured in Kelvins (K), color temperature ranges from warm, yellowish tones around 2700K to cool, bluish tones above 5000K. The right temperature for each lighting layer enhances both functionality and comfort.
For ambient lighting, 3000-4000K provides the sweet spot between warm and cool. This neutral-to-slightly-warm range creates comfortable general illumination without the yellowish tint of traditional incandescent bulbs or the sterile feeling of daylight-balanced lights. It works equally well morning, afternoon, and evening, making it the most versatile choice for your foundational layer.
Task lighting benefits from slightly cooler temperatures around 4000-5000K. This range increases contrast and visual acuity, making food preparation safer and more efficient. The cooler tone mimics natural daylight, reducing eye strain during extended tasks like cooking multi-course meals or detailed recipe work. However, avoid exceeding 5000K, which feels too clinical for residential kitchens.
Accent and decorative lighting should trend warmer, typically 2700-3000K. These warm tones create the inviting, intimate atmosphere appropriate for evening entertaining and dining. The yellowish quality complements wood tones, makes skin tones appear more flattering, and signals relaxation rather than work mode.
Mixing Color Temperatures Strategically
Successfully mixing color temperatures requires intentionality. Your ambient layer establishes the baseline temperature—usually 3500-4000K. Task lighting can be 500-1000K cooler without creating jarring contrast, while accent lighting should be 500-1000K warmer than ambient. This creates subtle differentiation between layers without the dissonant feeling of random color temperatures throughout the space.
Dimming technology allows you to adjust both brightness and perceived color temperature. As lights dim, they often shift slightly warmer, mimicking the natural transition from daylight to evening. This quality makes dimmable fixtures across all layers essential for true lighting flexibility. Install dimmers on separate circuits for each layer to control brightness and mood independently.
Test color temperatures in your specific kitchen before committing to fixtures throughout the space. Purchase sample bulbs in 2700K, 3000K, 3500K, and 4000K to evaluate how each appears with your cabinet finishes, countertop materials, and paint colors. What looks perfect in a showroom might feel wrong in your space due to reflective surfaces and existing natural light.
Fixture Placement: The Technical Details
Successful kitchen lighting design requires precise fixture placement based on your specific layout and ceiling height. General guidelines provide starting points, but your kitchen’s unique dimensions and configuration demand customized solutions. These measurements help you avoid common placement mistakes that create shadows, glare, or uneven illumination.
Recessed Lighting Spacing Formula:
- Divide ceiling height by 2 to determine spacing between fixtures
- For 8-foot ceilings: place fixtures 4 feet apart
- Position fixtures 3 feet from walls to avoid shadowing
- Create a grid pattern for even ambient coverage
Kitchen islands require special attention for pendant spacing. Measure your island length and divide by the number of pendants plus one. For example, a 72-inch island with three pendants: 72 ÷ 4 = 18 inches from each end and 18 inches between pendants. This formula creates balanced spacing regardless of island size or pendant quantity.
Under-cabinet task lighting should begin 3-4 inches from the cabinet’s front edge to prevent glare on backsplashes while maximizing counter illumination. Run continuous LED strips the entire cabinet length, or space puck lights every 12-18 inches for individual fixtures. Connect strips or pucks with in-cabinet linking cables to minimize visible wiring.
Pendant height above islands or peninsulas depends on ceiling height and pendant size. The standard 30-36 inches above countertop surfaces works for 8-10 foot ceilings. Taller ceilings allow for longer drop lengths, while ceiling fans or low beams might require shorter drops. Always ensure pendants don’t obstruct sight lines across the room—you should see through or over fixtures from standing positions.
Smart Lighting Controls and Automation
Modern kitchen lighting extends beyond fixtures and placement into intelligent control systems that adapt lighting automatically based on time, activity, or preference. Smart lighting transforms your layered design from static to dynamic, adjusting throughout the day without manual intervention. This technology makes professional-level lighting accessible to homeowners through intuitive controls.
Smart switches and dimmers replace traditional controls, connecting your lighting layers to smartphone apps, voice assistants, or automated schedules. Program morning routines that gradually brighten ambient and task layers as you wake, transition to focused task lighting during meal prep, and dim to accent-only lighting for evening entertaining. These scenes activate instantly rather than requiring manual adjustment of multiple switches.
Motion sensors add convenience and energy savings to kitchen lighting. Install sensors for under-cabinet task lights that illuminate automatically when you approach counters, then turn off after a preset time. This hands-free operation proves especially valuable when your hands are full or messy from cooking. Position sensors carefully to avoid false triggers from adjacent room movement.
Daylight harvesting technology adjusts artificial lighting based on available natural light. Photosensors measure ambient daylight levels, automatically dimming or brightening fixtures to maintain consistent illumination throughout the day. This advanced approach saves energy while ensuring your kitchen never feels too dim on cloudy days or excessively bright on sunny afternoons.
Voice control integration brings ultimate convenience to kitchen lighting. While cooking with messy hands, simply say “brighten task lights” or “dim to 30 percent” without touching switches. Voice commands work particularly well for kitchens where traditional switch access becomes awkward or inconvenient during meal preparation.
Common Kitchen Lighting Mistakes to Avoid
Even well-intentioned lighting plans fail when common mistakes undermine the layered approach. Understanding these pitfalls helps you avoid expensive corrections after installation. These issues appear consistently in poorly lit kitchens, regardless of budget or design style.
Over-relying on recessed lighting creates the most frequent problem. Homeowners install numerous recessed fixtures expecting comprehensive coverage, only to discover harsh shadows and uneven illumination. Recessed lights work excellently for ambient layers but cannot replace dedicated task and accent lighting. Combine recessed ambient lights with under-cabinet strips and decorative fixtures for complete coverage.
Insufficient task lighting at key work zones forces you to work in your own shadow. The problem becomes especially noticeable at kitchen islands where overhead ambient lighting hits the back of your head, casting shadows on the surface below. Always position task lighting between your head and work surface to eliminate this shadow effect.
Ignoring dimming capability limits your lighting’s flexibility dramatically. Installing beautiful fixtures on non-dimmable circuits means you’re stuck with single-intensity lighting regardless of activity or time of day. Every lighting layer should include dimming capability on independent circuits, allowing you to adjust each layer separately for maximum versatility.
Mismatched color temperatures create discordant lighting that feels uncomfortable even when technically adequate. Random bulb purchases lead to fixtures producing 2700K here, 4000K there, and 5000K elsewhere—a visual cacophony that undermines your design. Select color temperatures intentionally for each layer and maintain consistency within those layers.
Forgetting about bulb replacement accessibility causes long-term frustration. That stunning pendant fixture becomes a liability when bulb changes require a ladder, two people, and 20 minutes of effort. Consider maintenance accessibility during fixture selection, especially for task and ambient layers that operate many hours daily.
Budget-Friendly Lighting Upgrades
Professional-level kitchen lighting doesn’t require complete renovation or unlimited budgets. Strategic upgrades to existing lighting improve functionality and aesthetics significantly without rewiring or major construction. These practical solutions work for renters, budget-conscious homeowners, or anyone wanting immediate improvement.
LED under-cabinet strips represent the highest-impact upgrade available for under $150. Battery-operated or plug-in versions install in minutes without electrical work, instantly adding crucial task lighting to countertops. Adhesive-backed strips stick directly to cabinet undersides, with integrated dimmers allowing brightness control. This single upgrade transforms counter workspaces more dramatically than any other budget option.
Smart bulbs convert standard fixtures into controllable, color-adjustable, dimmable lights without rewiring. Replace existing bulbs with smart LEDs, connect to your smartphone, and suddenly your basic fixtures respond to voice commands and automated schedules. This approach proves especially effective for ambient ceiling fixtures and decorative pendants where fixture replacement isn’t feasible.
Portable task lamps supplemented dedicated work zones that lack built-in lighting. Small LED lamps placed near stoves, sinks, or prep areas provide focused illumination exactly where needed. Modern battery-operated options include magnetic mounting, wireless charging, and motion activation—professional features at consumer prices.
Retrofit recessed lighting kits update outdated can lights without ceiling reconstruction. These kits install in minutes, converting old-style recessed housings to energy-efficient LEDs with improved light quality and integrated trim. For under $30 per fixture, you dramatically improve ambient lighting without the mess and expense of new installations.
Dimmer switch upgrades cost $15-$50 per switch and install easily for confident DIYers. Replacing standard switches with dimmers adds crucial control to existing circuits without changing fixtures. Smart dimmers add app control, voice integration, and scheduling for just $40-$80 per switch—professional capabilities at reasonable prices.
Conclusion
Mastering kitchen lighting design through strategic layering transforms your space from merely functional to professionally designed. Your ambient layer provides the foundation of even, comfortable illumination. Task lighting ensures safety and efficiency at every work surface. Accent lighting adds the personality and warmth that makes kitchens inviting.
Remember that successful kitchen lighting design starts with calculating your specific lumen requirements, positions fixtures based on your unique layout, and incorporates independent dimming for maximum flexibility. Whether you’re planning a complete renovation or upgrading existing lighting, the layered approach ensures your kitchen performs beautifully from dawn coffee to midnight snacks.
Start by assessing your current lighting weaknesses, then prioritize upgrades based on impact and budget. Even modest improvements to task lighting or adding simple dimming controls dramatically enhance how your kitchen functions and feels. Layer your light like a pro, and you’ll wonder how you ever worked in inadequate illumination.
Frequently Asked Questions
Q: How many layers of light should a kitchen have?
A: Every kitchen needs at least three fundamental lighting layers: ambient (general illumination), task (focused work area lighting), and accent (decorative/highlighting). More complex kitchens may add decorative fixtures as a fourth layer. Each layer should operate on independent circuits with dimming capability for maximum flexibility. This layered approach ensures proper illumination for all activities from intense meal prep to intimate dining.
Q: What color temperature is best for kitchen lighting?
A: Kitchen lighting benefits from a range of color temperatures: 3000-4000K for ambient lighting provides neutral, comfortable general illumination; 4000-5000K for task lighting increases contrast and visibility for food preparation; 2700-3000K for accent lighting creates warm, inviting atmosphere. Avoid mixing temperatures randomly—maintain consistency within each layer while allowing slight variations between layers for visual depth and functionality.
Q: Should kitchen lights be on the same switch or separate circuits?
A: Kitchen lighting layers should always operate on separate circuits with independent dimmers. This allows you to adjust each layer independently—brightening task lights during meal prep while keeping ambient lights dimmed, or using only accent lighting for evening ambiance. Single-switch control eliminates the flexibility that makes layered lighting effective. Plan for at least three separate switched circuits during kitchen renovations.
Q: How many lumens do I need for kitchen lighting?
A: Calculate lumens based on your kitchen’s square footage: ambient lighting requires 35-50 lumens per square foot, task lighting needs 70-80 lumens per square foot in work zones, and accent lighting adds 10-15 lumens per square foot. A 150 square foot kitchen needs approximately 5,250-7,500 lumens for ambient coverage, plus additional task lighting at counters, islands, and sink areas. LED fixtures list lumen output on packaging for easy calculation.
Q: Where should pendant lights be placed over a kitchen island?
A: Hang pendant lights 30-36 inches above the island counter surface for standard 8-10 foot ceilings. Space multiple pendants evenly by dividing island length by the number of pendants plus one—for example, three pendants over a 72-inch island should be placed 18 inches from each end with 18 inches between fixtures. Ensure pendants don’t obstruct sight lines across the kitchen, especially if the island includes seating areas where diners face the fixtures.
🏡 Explore More Home Improvement Guides
- Complete Flooring Guide: Every Type Explained for Your Home
- Complete Bathroom Renovation Guide: Style, Function & Budget Solutions
- Bathroom Renovation Masterclass: Your Complete Guide to a Successful Remodel
- Best Flooring for Every Room: Complete Guide with Expert Tips
- Kitchen Remodeling Guide: Everything You Need for a Successful Transformation
- Home Renovation Permits and Regulations: Complete Checklist
- Renovation Mistakes That Cost Thousands (And How to Avoid Them)
- Kitchen Layout Planning: Which Design Works for You?
- Best Kitchen Countertops: Comparing All Materials
- Smart Home Technology Integration Guide: Room-by-Room Blueprint
- Outdoor Living Spaces: Complete Design Guide for Year-Round Enjoyment
- Best Home Office Setup (2025 Guide): Accessories & Essentials for Productivity
- DIY vs Hiring Contractors: When to Call the Pros?
- Home Renovation Cost Breakdown: Budget Like a Pro
- How to Plan Your Home Renovation: Step-by-Step Timeline
- Complete Home Renovation Guide: Transform Your House Into Your Dream Home


